
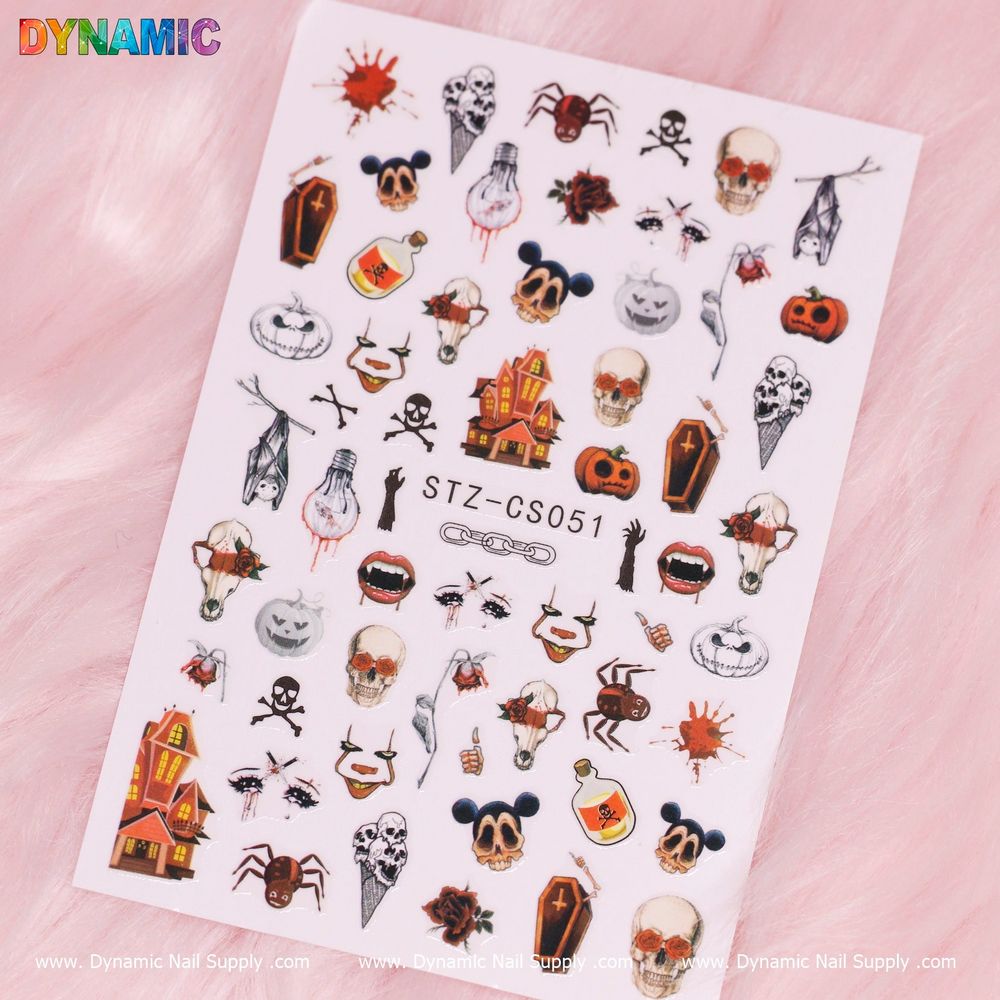
Halloween nail stickers are a fast, low-commitment way to add spooky flair to your manicure. This beginner-oriented guide explains what haunted Halloween nail stickers are, breaks down common motifs you’ll see, and walks you step-by-step through application, finishing and care so your look lasts through party nights and trick-or-treating.
What are haunted Halloween nail stickers?
Haunted Halloween nail stickers are adhesive decals designed for nails that carry horror-themed imagery—think skulls, bats, cobwebs and tombstones. They’re a single-sheet decoration you place on natural nails, polish, or enhancements like acrylics and gels to create instant seasonal art without freehand painting. The product name you’ll find in listings is often descriptive; for example, the Haunted Halloween Sticker (STZ-CS051) is a compact option aimed at seasonal nail looks.
If you want to try them on a budget, consider ordering this haunted sticker sheet — they’re an easy way to experiment with Halloween designs without needing specialist tools.
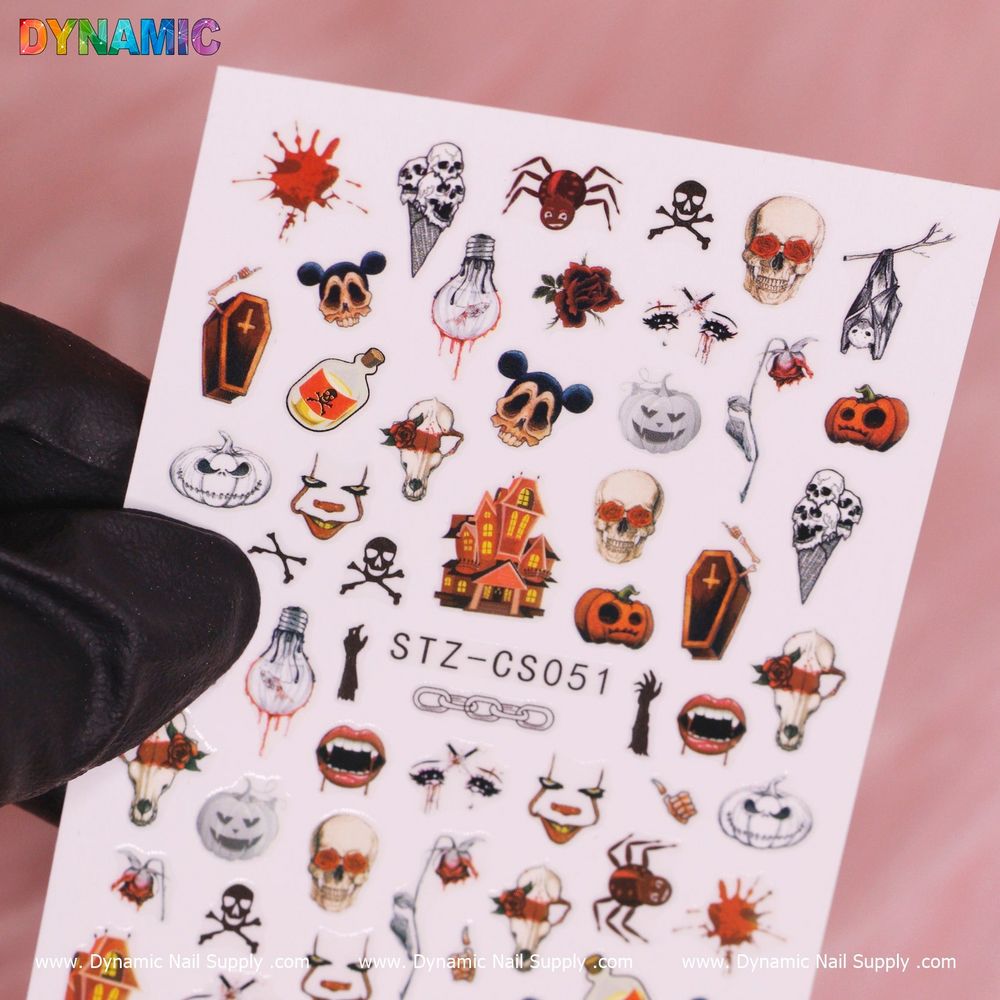
Key terms and motifs to know
Understanding a few common terms makes shopping and applying easier:
- Sticker sheet: The full backing sheet that holds multiple designs.
- Decal vs. sticker: Decals may require water-slide transfer, while stickers are usually peel-and-stick. Confirm the application type on the product listing.
- Motifs: Common Halloween themes include bats, skulls, skeletons, spiders, bloody accents and tomb imagery; choose motifs that match the vibe you want—cute, gothic, or horror.
Step-by-step application for beginners
- Prep the nail: Clean the nail surface, push back cuticles, and file to the desired shape. If using polish, apply a base coat first and allow it to dry completely.
- Test placement: Remove the sticker from the sheet and hold it above the nail to confirm size and placement. Trim if a design is slightly larger than the nail bed.
- Apply the sticker: For peel-and-stick stickers, peel carefully and press onto the nail starting at the center and smoothing outward to eliminate air bubbles. For water-slide decals, follow the product’s soak-and-slide instructions if provided in the listing.
- Seal the edges: Gently press down the edges with a wooden stick or fingertip. This step reduces lifting and helps the sticker conform to the nail curve.
- Topcoat: Apply one or two layers of a clear topcoat to lock the design in place and add shine. Let each layer dry fully.
- Clean up: Remove stray adhesive from surrounding skin using a small brush dipped in nail cleaner or acetone, if needed.
Practical tips to get professional-looking results
- Work on dry polish: Stickers adhere best to fully cured polish or a clean bare nail surface.
- Use thin topcoats: Thick gels can cause bubbles; use thin, even topcoat layers for a smooth finish.
- Trim for fit: Small scissors or nail clippers let you trim stickers to better fit narrow nail beds or accent placement.
- Mix and match: Combine motifs—like a skull on an accent nail with tiny bats on others—for cohesive sets that don’t look repetitive.
- Practice patience: Rushing increases the chance of wrinkles or misalignment. Take your time on each nail.
Key features in context
While specifications vary by listing, haunted-themed nail stickers typically offer:
- Multiple small designs on a single sheet so you can create coordinated looks across both hands.
- High-contrast motifs—skulls, spiders, and bloody accents—that show well against dark polish or matte finishes.
- Budget-friendly pricing; for example, some sheets are sold around $2.00 (prices may change), making them ideal for seasonal experimentation.
Who these stickers are for
Haunted Halloween nail stickers are a great fit for:
- Beginners who want Halloween-themed nails without hand-painting skills.
- Busy people seeking a quick seasonal manicure for parties or events.
- Salon techs who want a fast accent option for clients during the Halloween season.
Care and safety notes
To keep your haunted nails looking good and avoid irritation:
- Avoid skin contact with adhesive as a routine; if you have sensitive skin, test a small area first.
- Topcoat refresh: Reapply a thin topcoat every few days to extend wear and prevent peeling.
- Removal: Remove stickers gently with an oil-based remover or acetone-soaked pad to avoid excessive peeling that can damage the nail surface.
- Storage: Keep unused sticker sheets flat and in a cool, dry place away from direct sunlight to preserve adhesion.
Final thoughts
Haunted Halloween nail stickers are an affordable, low-effort way to join the seasonal spirit. Whether you’re aiming for creepy, cute, or classic gothic, a single sheet of stickers lets you experiment with motifs like bats, skulls, and tomb imagery without special tools. If you’d like to buy a starter sheet, many retailers including Dynamic Nail Supply offer themed options perfect for beginners and quick salon add-ons.
With a little patience in prep and sealing, these stickers deliver spooky, salon-look nails that hold up through Halloween festivities.
